
This post may contain affiliate links, which means I may receive a commission from purchases made through the links.
While traditional large apple pies are great for gatherings, making individual handmade apple pies offers a unique charm. These smaller versions are perfect for packed meals such as work lunch, portion control, easy sharing, and even make for beautiful edible gifts! Of course, you can bring these mini apple pies to family gatherings too. Think of the convenience – simply grab and munch without a need for cutlery – everybody will thank you. Otherwise, simply bake and enjoy them at home!

Ingredients for the pie dough
- Unsalted butter – 1.5 sticks (3/4 cup): Must be cold. Slice it very thinly. You can also cut it into tiny cubes.
- All-purpose flour – 2 1/4 cups: Sift before measuring as compact flour could interfere with the ratio of the ingredients and lead to a tough pie dough.
- Sugar – 2 tbsp: This is a sweet pie, so the dough should be a little on the sweet side.
- Salt – 1 tsp: Helps balance out the taste of the pie dough which would otherwise be too flat.
- Water – 1/2 cup: Use ice-cold water to avoid melting the butter prematurely, which could interfere with the texture of the pie crust.


Ingredients for the apple filling
Apples: You’ll need 3 medium apples, preferably Granny Smith apples, because of their sweet and tart flavor which is perfect for apple pies. Of course, you could use any other type of apple that you love. As long as it is a pie-making apple.
Sugar: You’ll need 1/4 cup of sugar to sweeten the apples, especially if you go with a tart variety. I like to use light brown sugar but white granulated sugar works perfectly too.
Salt – 1/8 tsp: To balance out the taste of the filling.
Cinnamon – 1tsp: The apple filling just feels incomplete without cinnamon.
Corn starch – A thickener is a must-have in this recipe, to hold together the filling and prevent a soggy pie crust. Mix one tablespoon of cornstarch with a quarter cup of cold water to make the thickener.
Unsalted butter – This is optional, but adding two tablespoons of butter to the filling enhances its creaminess and flavor.
Last step ingredients
Eggwash: Eggwash adds that glossy and golden brown finish to the pies. To prepare egg wash, beat one egg with 2 tablespoons of milk.
Granulated sugar: You’ll need about half a teaspoon of granulated sugar to sprinkle on top of the pies for a perfect and professional-looking crust.

Steps for Handmade Apple Pies
1. Prepare the Pie Dough
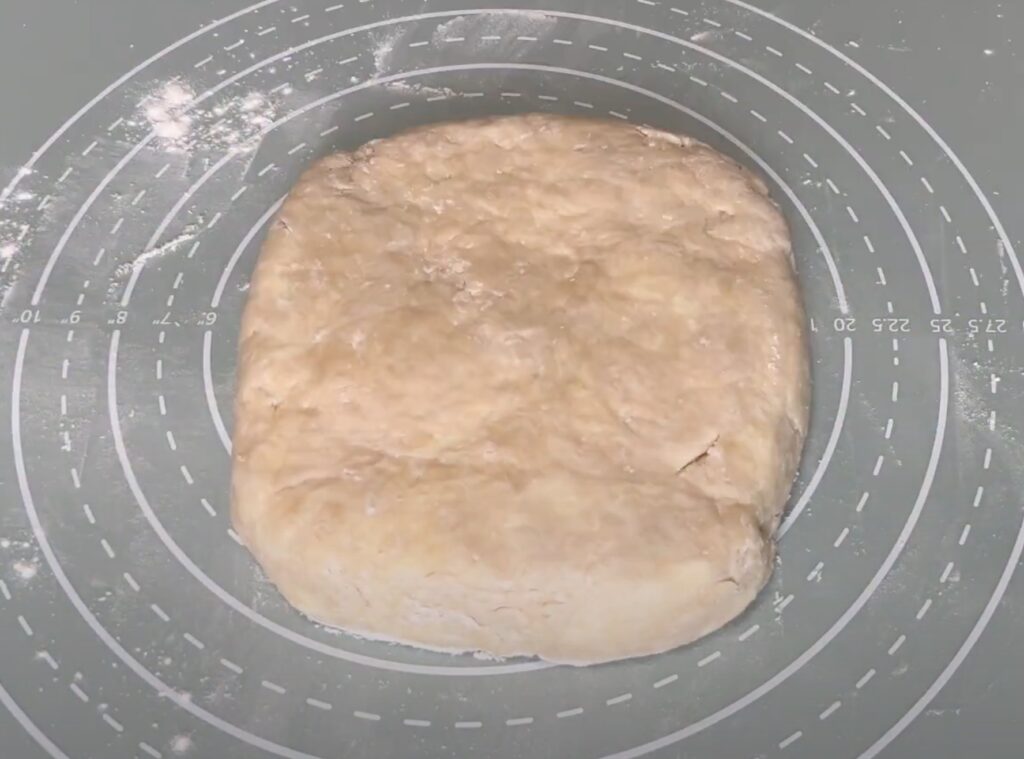
In a large bowl, whisk together the flour, sugar, and salt. Add the cold, thinly sliced, or cubed butter and use your hands to mix it with the flour. Do not rub the butter into the flour but rather incorporate it in. Separate any pieces that are stuck together. Then, gradually add the ice water, about two tablespoons at a time, and mix with a fork until the dough starts to come together. Transfer the dough to a wide surface and press it together until a ball is formed. The dough should be firm. Flatten the ball a little by pressing on it with the palm of your hand to form a disk-like shape. Wrap the disk in plastic wrap, and refrigerate it for at least 30 minutes. (Watch the recipe video here).

2. Make the Apple Filling
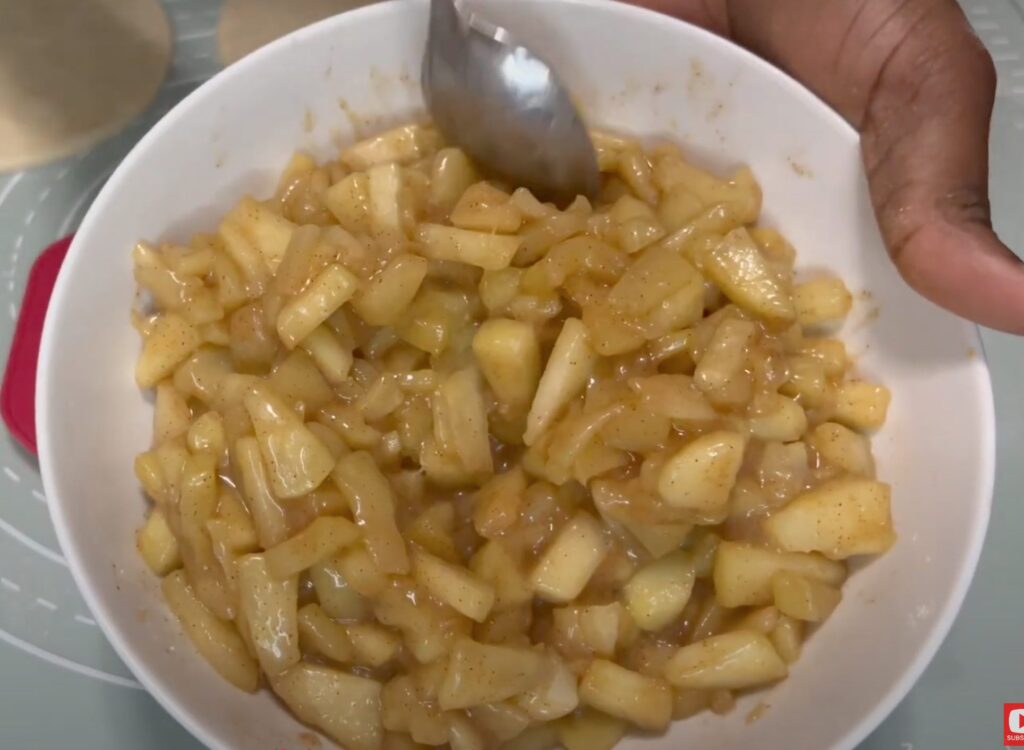
While the dough chills, prepare the filling. Peel and chop the apples into small cubes. Place them in a cooking pot and place them on medium heat. Add sugar, salt, and cinnamon, and cook for about 3 minutes or until the apples begin to release their juice. Reduce the heat to low. Then, add the cornstarch mixture and stir until the filling is uniformly thick. Turn off the heat, then add butter (optional) and stir it in to combine. Allow the filling to cool fully before using it. (Watch the recipe video here).

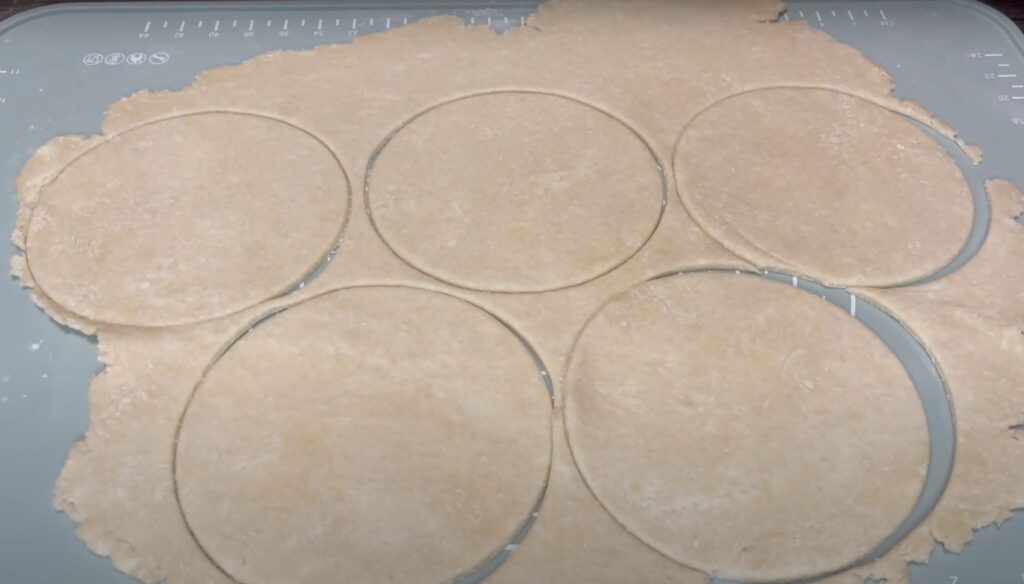
3. Roll Out the Dough
Preheat your oven to 400°F. Then, on a floured surface, roll out the dough disk to about 1/8-inch thickness. Using a round cutter like this dough press that I used, or a cup/bowl of appropriate size, cut out circles for the pies. (Watch the recipe video here).

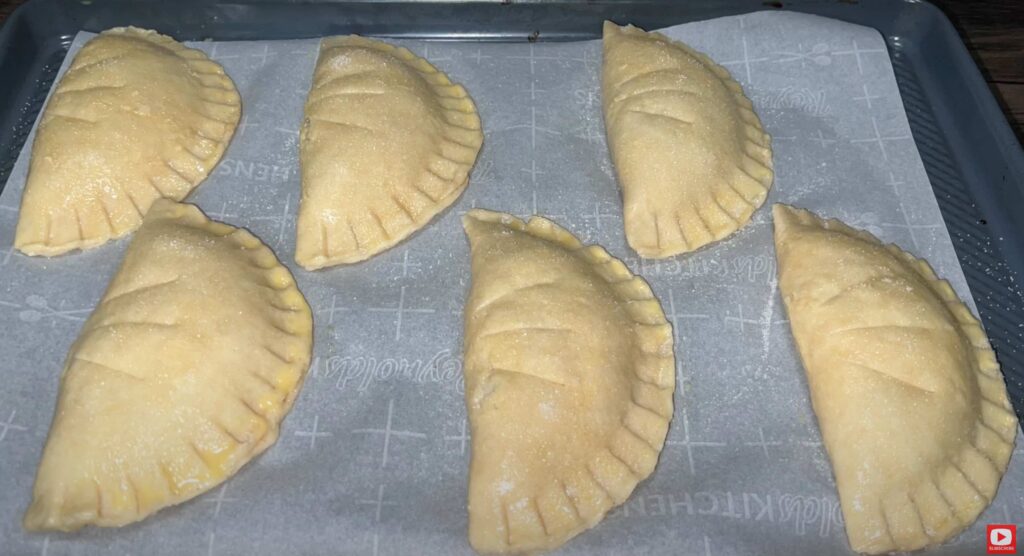
4. Assemble the Mini Pies
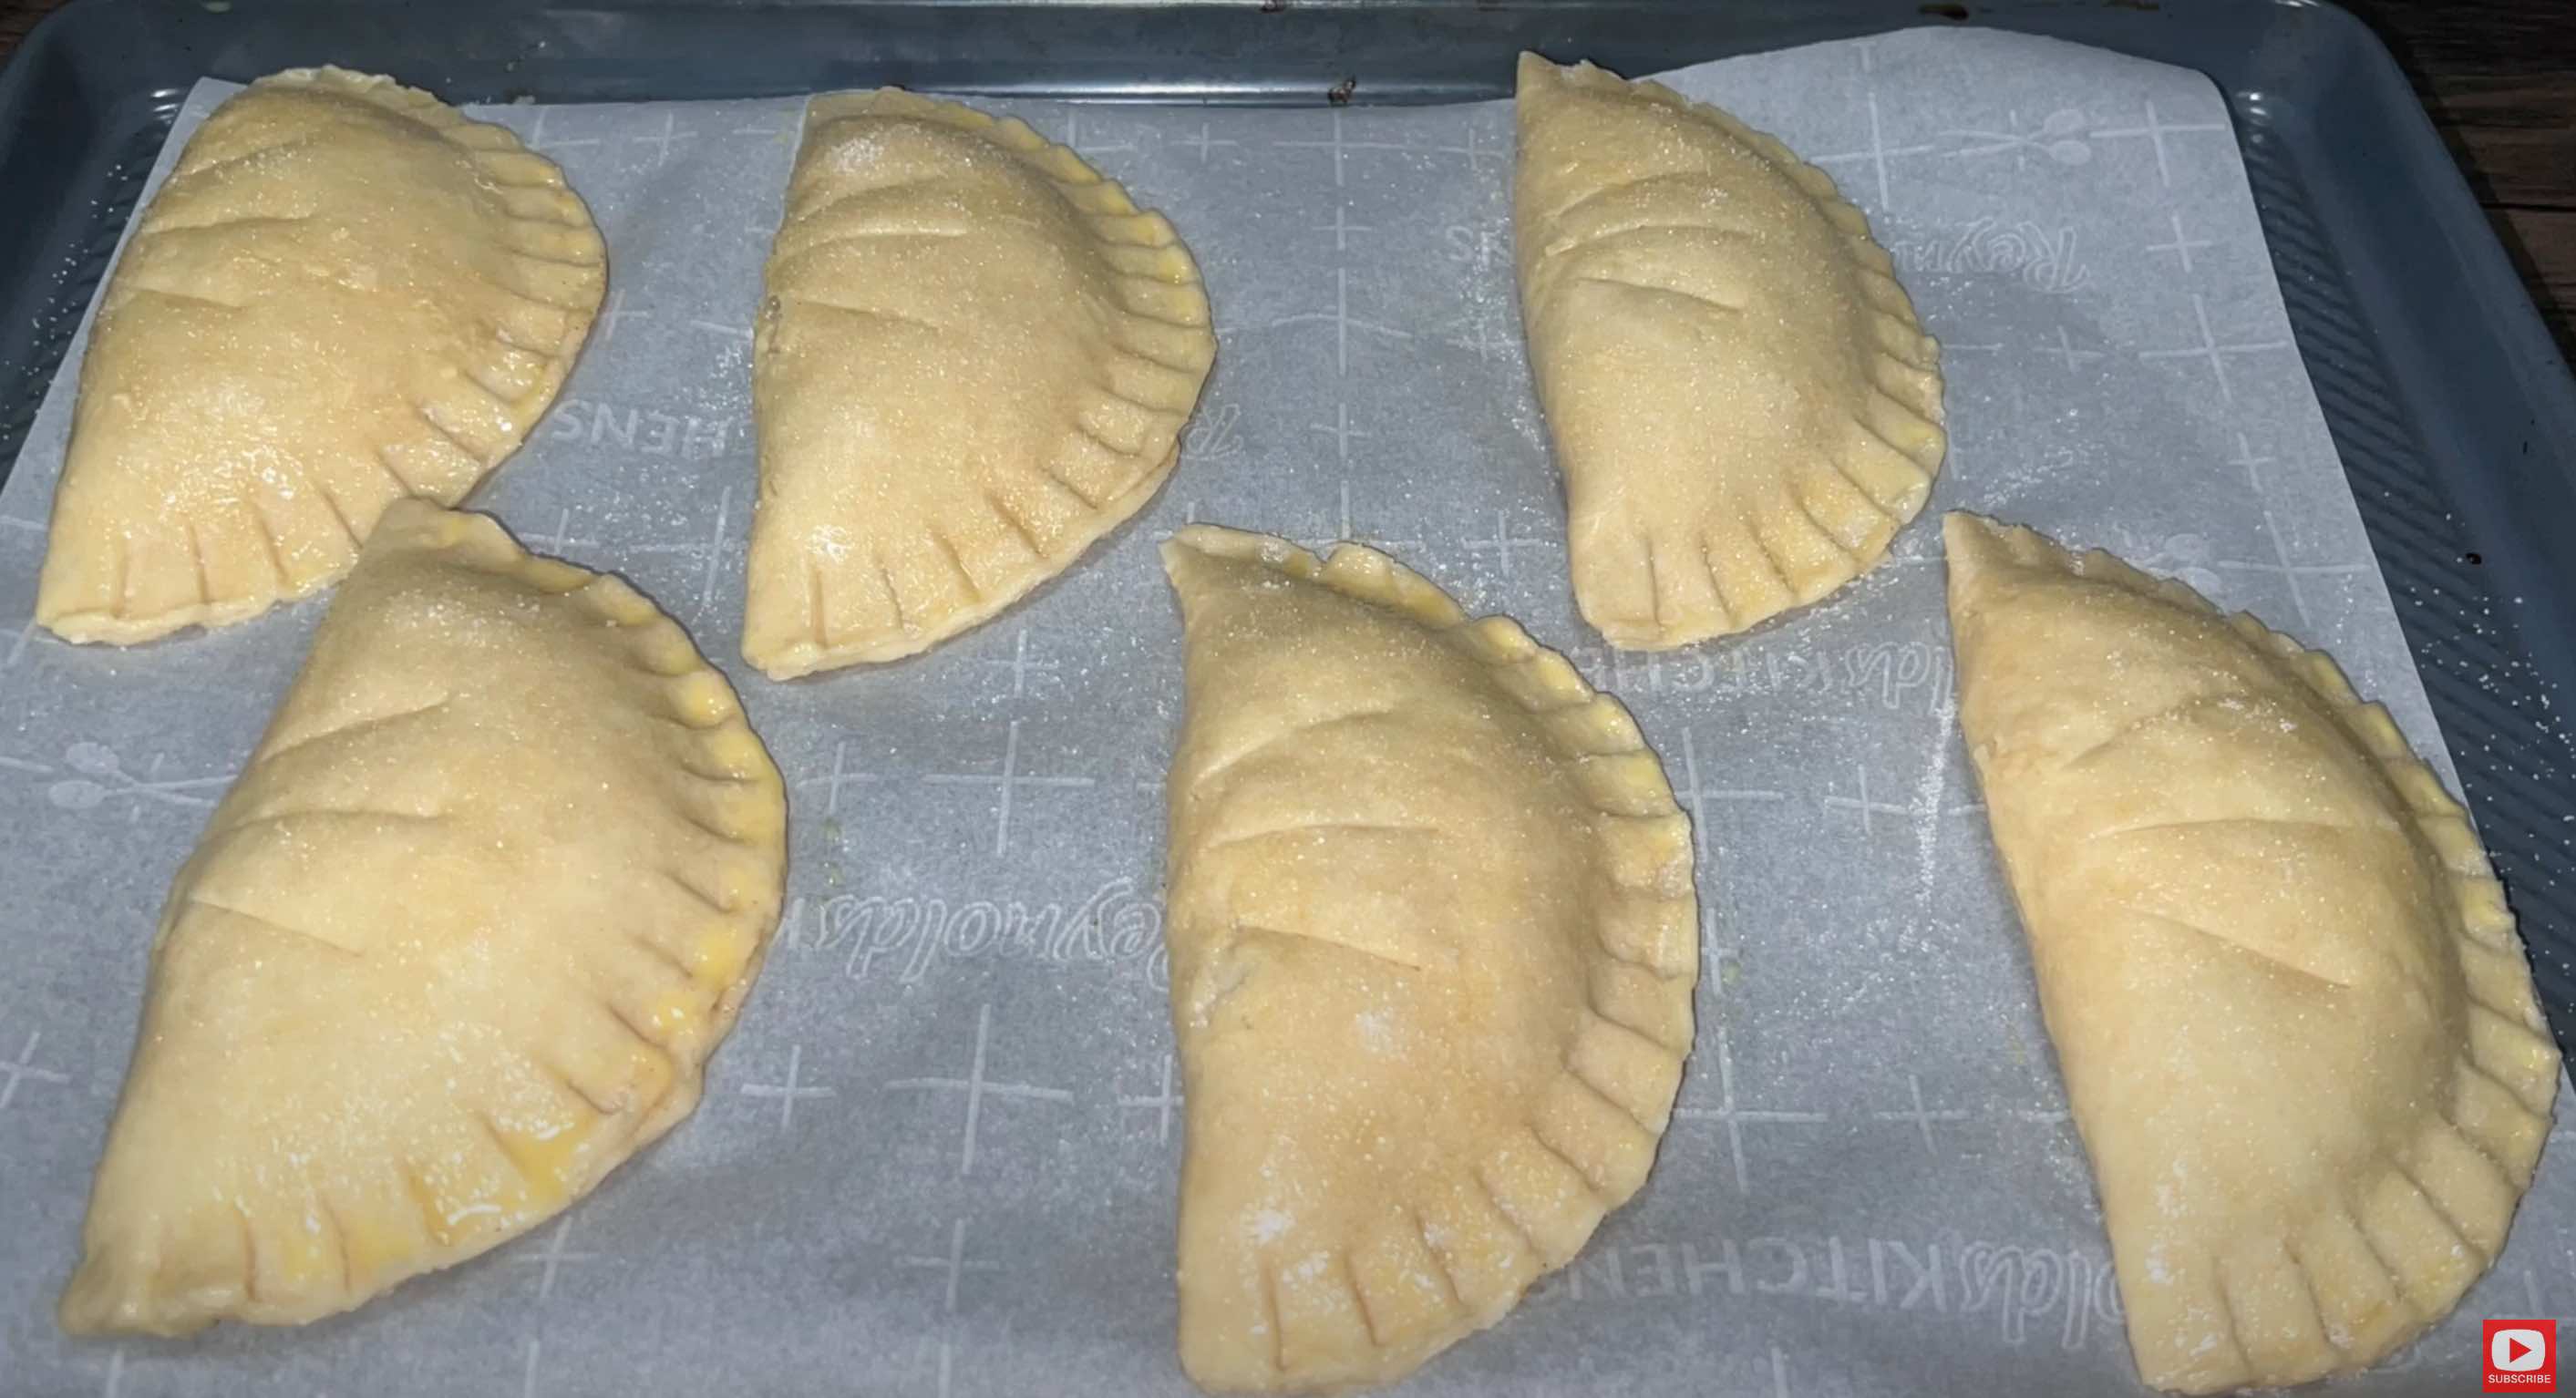
Working with one dough circle at a time, place it into the dough press and gently press its edges into place using your fingertips. Spoon the apple filling into the center of the pie circle, ensuring even distribution. Then, lift the edges of the dough press and press them together until the edges of the pie are sealed. Gently open the dough press, remove the pie, and place on a lightly floured surface. This dough press automatically crimps the pies for a decorative touch, so no additional crimping is needed. Brush the tops of the pies with the eggwash egg and sprinkle with granulated sugar. Then, make three little cuts on each pie to ensure ventilation as the pie bakes. (Watch the recipe video here).
NOTE: After you’re done creating the pies and before brushing them with eggwash, refrigerate them for 20 minutes if you notice that the dough has softened. This is especially possible if your kitchen is warm. The butter in the dough will most likely soften quickly, making the dough soft as well. So, for perfect results, cool the pies down before doing the last steps. The pies should go into the oven firm for the crust to form well.

5. Bake to Perfection
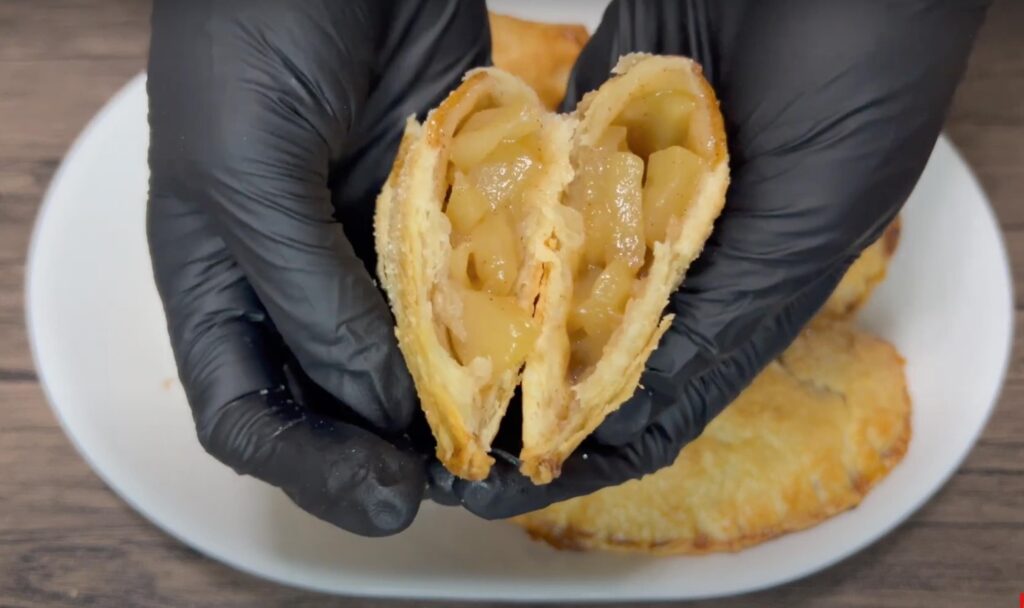
Bake the pies for 10 minutes at 400F, then lower the temperature to 375F and bake for another for 25-30 minutes, or until the crust turns golden brown and the filling bubbles slightly. Allow the pies to cool down in an aerated space. (Watch the recipe video here).
6. Serve and Enjoy
Enjoy your handmade apple pies warm on their own or with a scoop of vanilla ice cream. These mini pies are perfect for any occasion and can be stored in an airtight container for up to three days, or in the fridge for even longer.
My Amazon Affiliate Links
Please purchase any items you may need to make this recipe through these links to support this blog. I will earn commissions at no additional cost to you. Thank you so much!
- Dough Press tool for creating beautiful pies: https://amzn.to/411RMxH
- Euchoiz Silicon pastry mat: https://amzn.to/4fEIJHK
- Pizza cutter wheel: https://amzn.to/41fXiwF
- Baking sheet: https://amzn.to/3Ap6e7x
- KitchenAid Measuring cups: https://amzn.to/3MmlepD
- Mixing bowls (glass): https://amzn.to/3WFSFb9
- Stainless whisk: https://amzn.to/3M1sdUz
- Non-stick frying pan: https://amzn.to/3XacJEl
- Rolling pin: https://amzn.to/4clguej
- Pastry scraper: https://amzn.to/4cuG1lu
Print the Recipe
Conclusion
Handmade apple pies are a wonderful way to enjoy a timeless dessert in a convenient, personal size. They allow for creativity, easy sharing, and a delightful homemade experience. These pies are sure to bring you and your loved ones comfort and joy. So gather your ingredients, roll out your dough, and indulge in the magic of baking your own handmade apple pies!
Check out more recipes on my blog by visiting the Recipe Index, Breakfast, or Vegetarian sections of the blog.
My Amazon Affiliate Links
Please purchase any items you may need to make this recipe through these links to support this blog. I will earn commissions at no additional cost to you. Thank you so much!
- Dough Press tool for creating beautiful pies: https://amzn.to/411RMxH
- Euchoiz Silicon pastry mat: https://amzn.to/4fEIJHK
- Pizza cutter wheel: https://amzn.to/41fXiwF
- Baking sheet: https://amzn.to/3Ap6e7x
- KitchenAid Measuring cups: https://amzn.to/3MmlepD
- Mixing bowls (glass): https://amzn.to/3WFSFb9
- Stainless whisk: https://amzn.to/3M1sdUz
- Non-stick frying pan: https://amzn.to/3XacJEl
- Rolling pin: https://amzn.to/4clguej
- Pastry scraper: https://amzn.to/4cuG1lu
