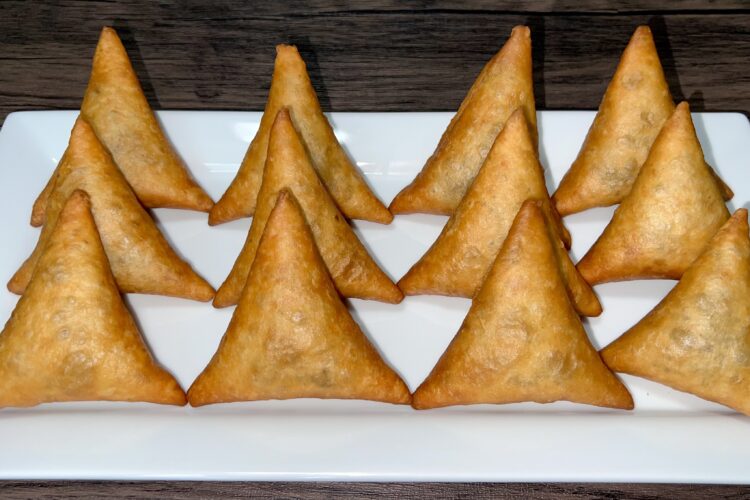
This post may contain affiliate links, which means I may receive a commission from purchases made through the links.
The most time-consuming part of making samosa, usually, is creating the wraps – you have to knead the dough, roll, and cook it just right, then peel and cut it. If you happen to make a mistake in measuring the ingredients, kneading the dough, or overcooking the wraps at the first stage, then you (or your dish) might be in trouble. Well, that’s not a problem with this recipe, because we will skip that whole part and simply grab some nice and soft flour tortillas from the nearest grocery store. In this recipe for beef samosa using tortillas as wraps, I demonstrate how you can cut down your samosa-making time from two hours to 30-40 minutes and still achieve top-level results.
Important Tips on Samosa Making
Before we dive into the recipe for beef samosa using tortillas, I will quickly go over some important tips to keep in mind when making samosa so that you achieve the kind of results that will leave everybody who tasted your samosas talking about them to everyone who cares to listen. I mean, samosas whose exterior is crispy and filling, flavorful, non-greasy, and with the right amount of moisture. Here are my five tips:
Tortilla Selection: Go for fresh and soft flour tortillas. The fresher they are, the bendier – which means they will be easy to fold and shape. Also, fresher tortillas have less chances of cracking and that means they will hold the filling well.
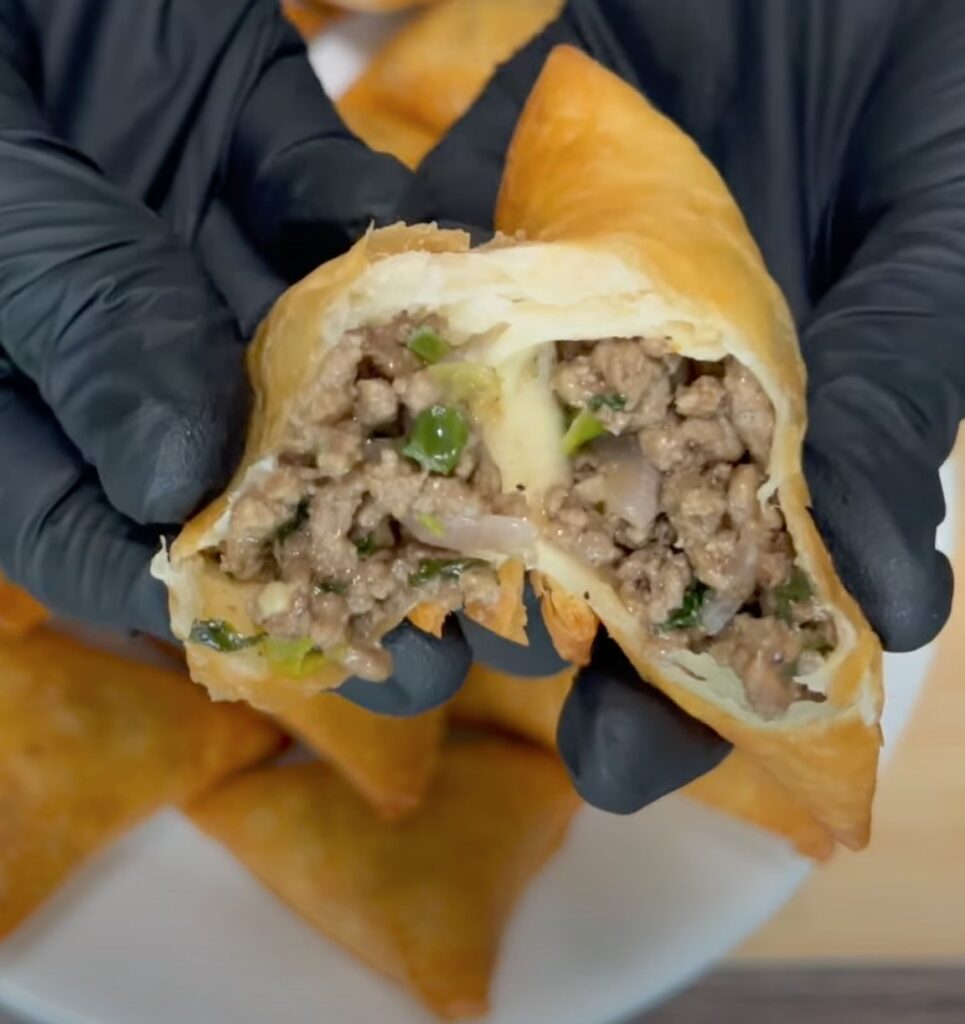
Filling Preparation: The filling, in this case, minced beef, should be cooked properly and have the right amount of moisture – it should neither be too dry nor too moist. If it’s too wet, it can cause the tortilla shells to become soggy. If it is too dry, well, who enjoys dry meat? Another key thing to note here is what kind of ingredients or seasonings to add to the filling. You wanna stay away from any moist ingredients like tomatoes and instead use those that are dryer, like onions, cilantro, and dry seasonings. I’ll talk more about this in the recipe steps below.
Folding and Sealing: Shaping the samosas and sealing them properly can be tricky but is absolutely doable. If samosas are not sealed well, the filling can leak out during frying and make a mess in the cooking oil. Besides, the cooking oil will seep through to the filling and add greasiness to it. It is important, therefore, to seal the samosas fully.
Frying: Maintaining the right oil temperature is crucial; you will not only cook the samosas thoroughly, but you will also achieve that appetizing golden brown exterior. If the oil is too hot, the samosas will burn on the outside and if it is too cool, they’ll absorb too much oil and become greasy.
Even Cooking: Ensuring that all samosas cook evenly and have a uniform color and crispiness can be challenging, especially if you’re frying in batches. This is why it is important to keep the same oil temperature throughout and pay attention to cooking time. That is, when to flip, and when to drain off the oil.
I elaborate on each of these tips further in the recipe steps below.
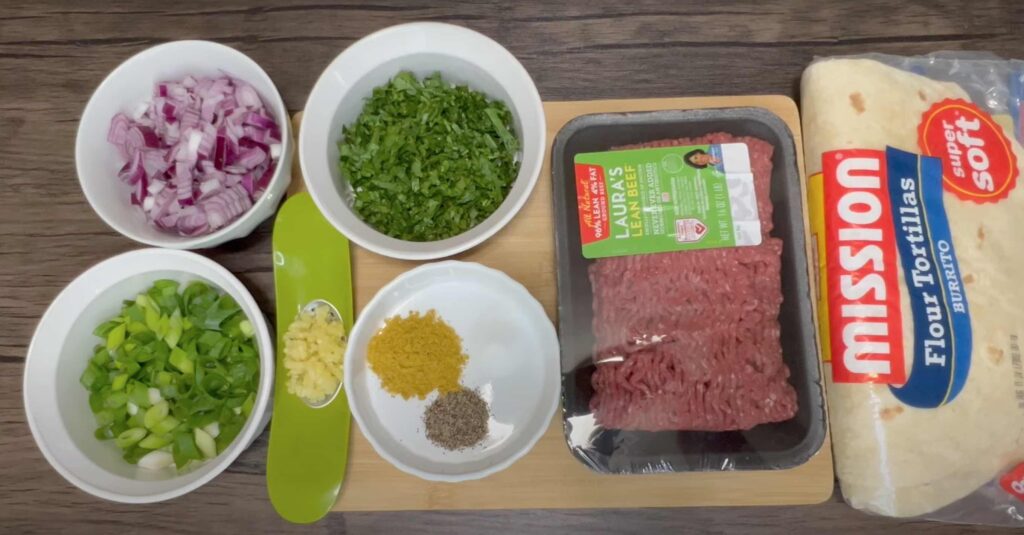
Ingredients for Beef Samosa Using Tortillas
Flour Tortillas: Go for wide, at least 10-inch-diameter flour tortillas. This is because you will cut them in quarters and the smaller your tortillas are, the smaller your samosas will be. As I mentioned earlier, soft and whenever possible, fresher tortillas will give greater results.
Ground beef: Go for leaner beef because a fattier option would lead to excess fat in the filling, which could result in soggy samosas. The beef does not have to be 100% lean. I used 70% lean beef in this recipe and the results were perfect.
Red onions: These will add a great aroma as well as flavor to the filling. Red onions become slightly sweet when cooked, which is perfect for this recipe. You will need about one cup of chopped red onions for this recipe. You will first use a quarter of it, then you will add the remaining three quarters at a later stage.
Garlic: Adds a wonderful aroma, of course. Garlic should be crushed finely so that it incorporates well into the filling.
Green onions: These are also great for added aroma, flavor, and most importantly, texture. As you will see in the recipe steps, these onions need not to cook for too long after they are added to the minced beef. They are supposed to retain a little bit of crunch which adds awesomeness to the samosas.
Cilantro: Whoa! The aroma! The cilantro effect on the filling is one of those things you do not wanna miss. Please make sure to add some cilantro to the filling because when you bite that samosa later, you’ll be so glad you did.
Dry seasonings: I used black pepper and beef masala in this recipe. A little goes a long way – you do not want to over-season (is there a thing or a word like that?) your filling. Pick a maximum of three dry seasonings to add to your filling alongside the onions and the cilantro. Of course, include salt too.
Other Requirements
All-purpose flour, cold water, and a little salt: You will need these to make glue batter which you will use to seal the samosas. No complications here. Easy peasy.
Oil for deep frying: Yes, you will need to deep fry the samosas, so have enough vegetable oil nearby. If the oil is too shallow, the samosas will touch the bottom of the pan and darken under. A good amount of oil ensures the samosas stay afloat and brown nicely.
Steps for Beef Samosa Using Tortillas
Please note that the recipe video is linked at the bottom of this post and in it, I demonstrate all of these steps.
Step 1: Prepare your ground beef filling.
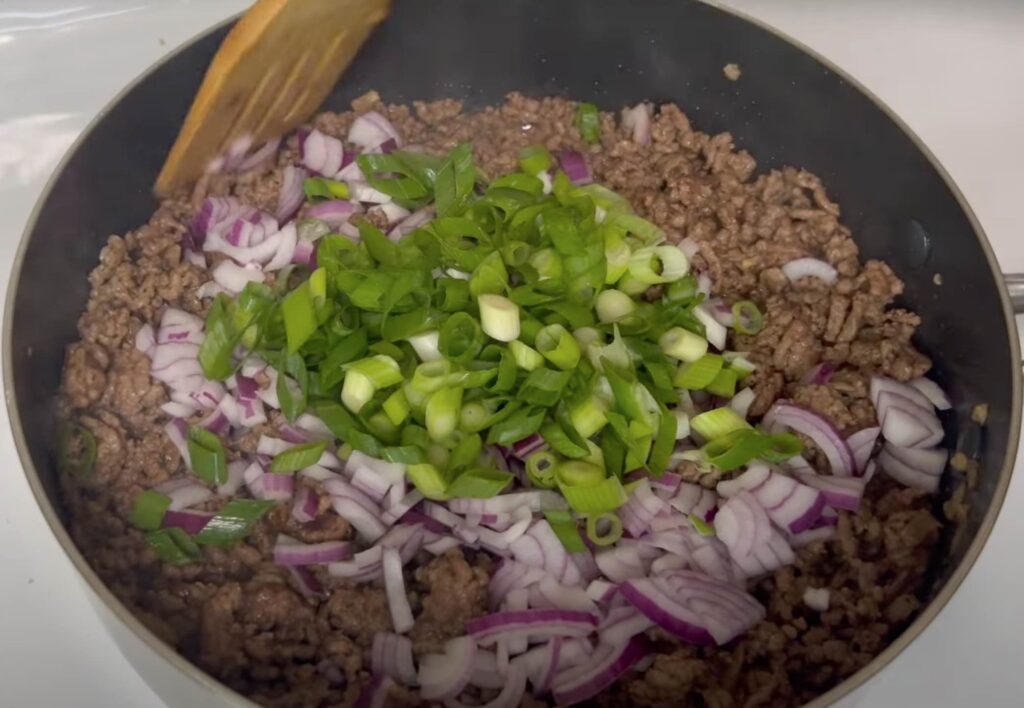
Heat about a tablespoon of cooking oil on medium-high. Fry a quarter cup of chopped red onions until slightly brown. Add garlic and fry for a minute or until it begins to change color too. Do not let the garlic brown too much. Add the ground beef. As it cooks, break it down with a wooden spoon to crush all the lumps. The meat should not be lumpy at all as that will complicate the samosa creation process. After the meat has lost its (raw) red color and has released some fluid, add salt and the dry seasonings. Cook for another minute, then add the rest of the red onions as well as the green onions. Stir them in and cover the pot for a minute so the onions can soften a little. Do not overcook. Finally, stir in the cilantro and take the pot off the heat. Leave it open or transfer the filling to a wide plate to cool down.
Step 2: Prepare the samosa glue batter.
In a bowl, combine half a cup of all-purpose flour, salt to taste (optional), and cold water to create a light, runny batter. The batter should not be too thin as it may not hold the tortillas well, neither should it be too thick as it will introduce a whole new texture and unnecessary chewiness to the tortillas.
Step 3: Cut your flour tortillas correctly.
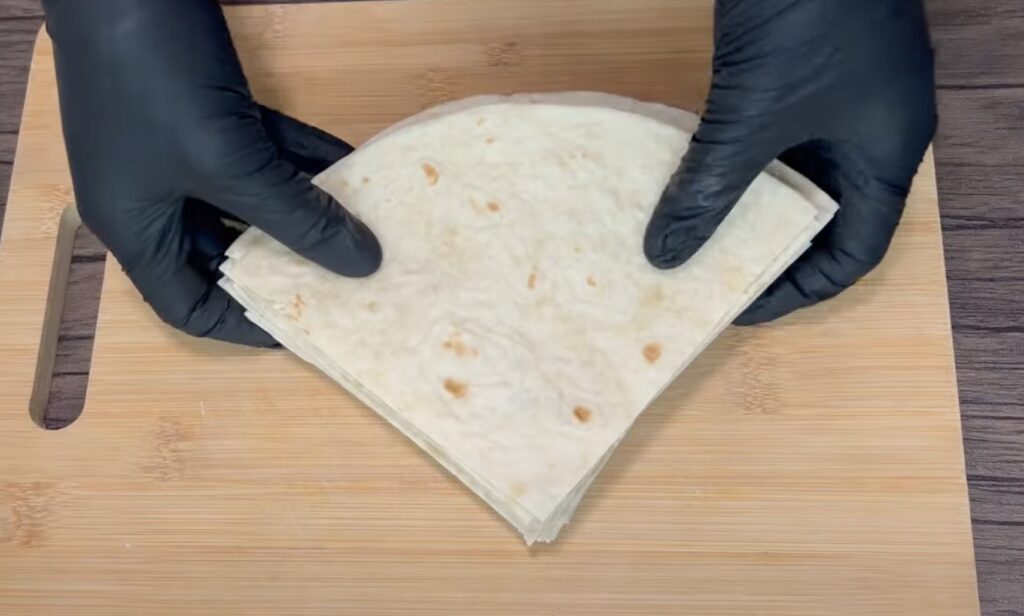
Layer up four or five tortillas on a wide cutting board and cut them into halves then quarters. As simple as that. Layering them up before cutting ensures an even size of the quarters.
Step 4: Create your samosas.
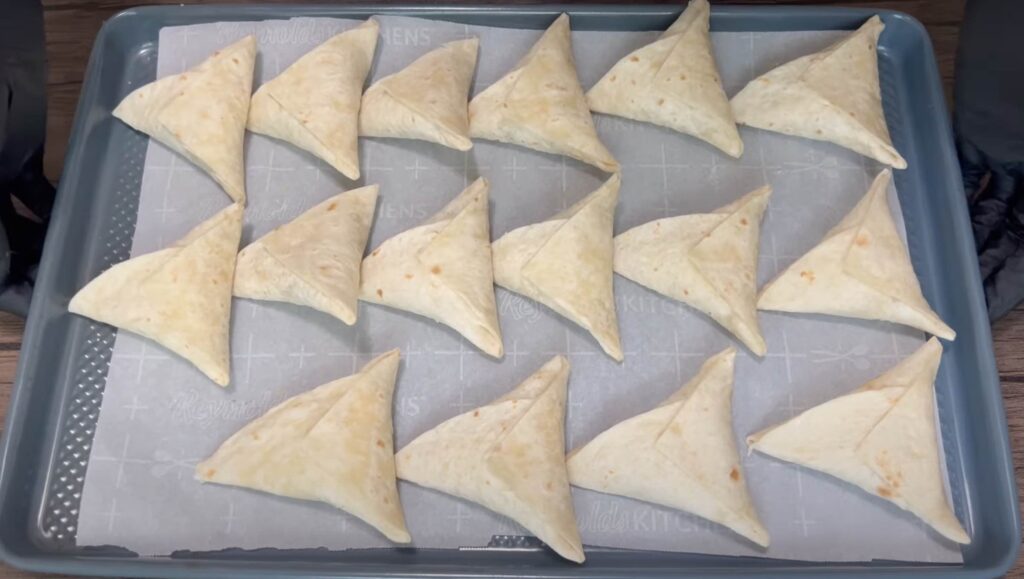
To create that nice triangular samosa shape, place the pie-shaped tortilla wrap on a flat surface with the sharp end facing you. Then, bring each of the curved ends towards the middle of the curve, one folding over the other, and the edge sharp and sealed. Apply the glue batter in between the two overlapping flaps of tortilla and seal (please watch the recipe video to get a clear picture of these steps). Then, fill the tortilla shell with about a tablespoon of ground beef. Do not overfill. Leave enough room for the overlapping flaps to fold over and tuck into the back end to seal in the stuffing. Apply glue on top of the folded-over section as well as on the sharp-edged section. Then, fold over the sharp-edged section and neatly stick it down, paying attention to the corners to make sure they are fully sealed. Press on each corner to seal it off completely. Place the samosa aside and repeat with the rest.

Step 5: Fry the samosas.
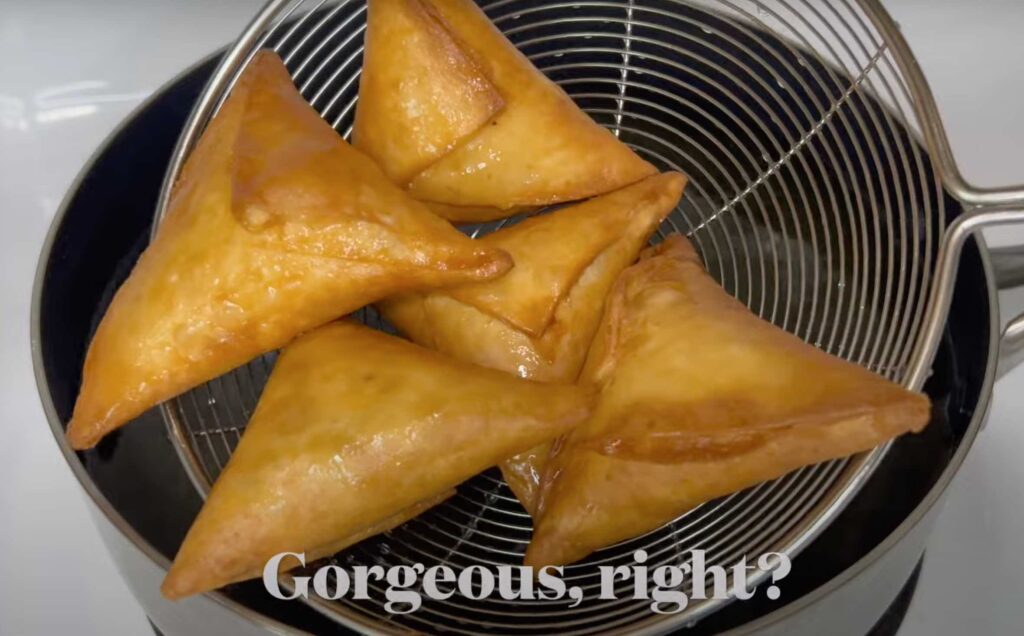
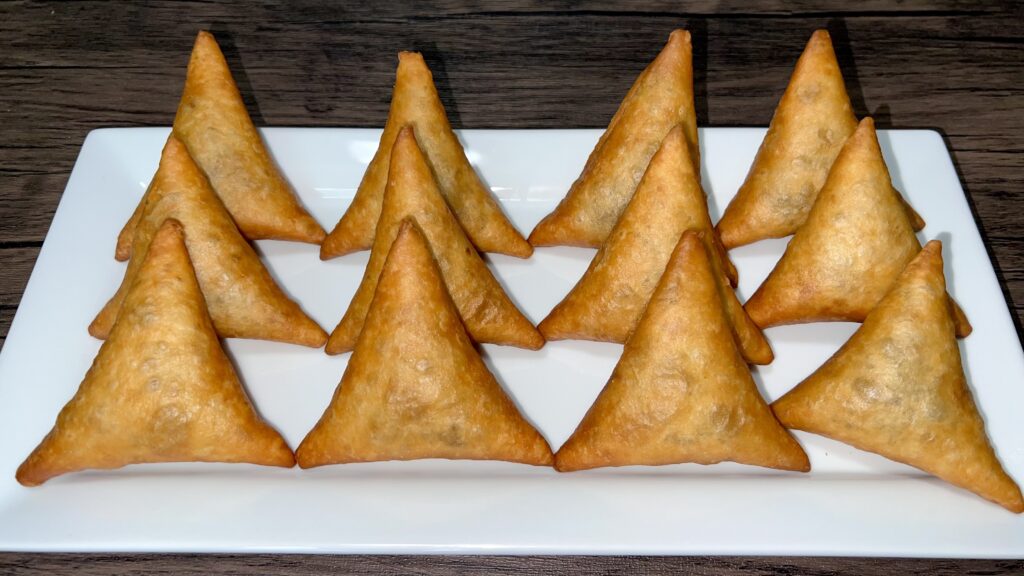
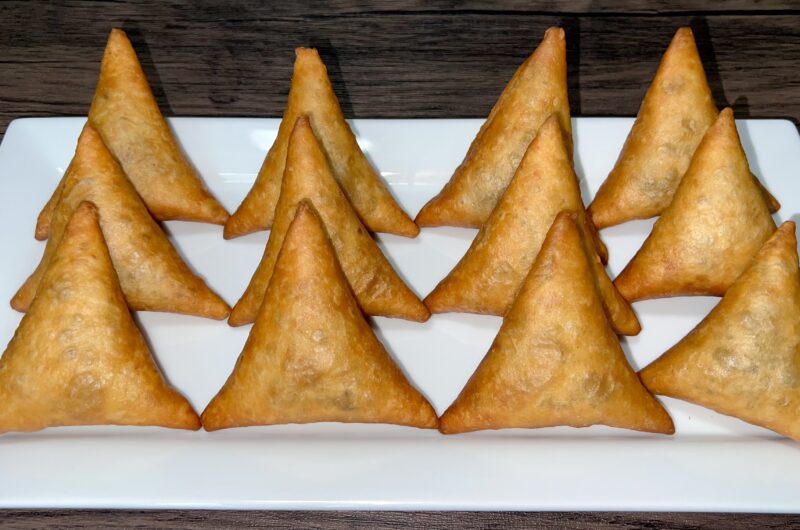
Heat deep frying oil on medium to medium-high. Once fully hot, add enough samosas to it so that they do not overlap. Allow the samosas to cook until browned enough before flipping. Flip and cook on the second side, then drain and place them on a plate lined with paper towels to absorb any excess oil. Allow the samosas to cool for about 7-10 minutes before eating. Otherwise, the stuffing may be extremely hot even when the exterior seems cool.
Serving suggestions for beef samosa using tortillas
Samosa is a complete meal in itself, so you can enjoy it alone. Some will serve samosa as an appetizer, especially before dishes such as beef pilau, biryani, chapati, or even fish.
Storing leftover beef samosa
You can freeze or refrigerate leftover samosa. Place it in an airtight container and store in the fridge for up to five days, or in the freezer for up to a month. The only downside to storing leftover samosa that is made of tortillas is that it loses its firmness and crispiness and becomes soft as it stays in the fridge. Depending on how you reheat it, this may be a fixable issue.
Reheating leftover beef samosa using tortillas
You can reheat leftover samosa in the microwave or in the oven. Allow the frozen samosa to defrost fully before reheating it for even reheating.
To reheat in the microwave, spread refrigerated or defrosted samosa on a wide plate and heat for 30 seconds or a minute. They heat up quite quickly. This method of reheating will result in soft samosas, but they will still taste and feel good.
To reheat in the oven, preheat the oven to 350F. Lay the refrigerated or defrosted samosa on the rack of a baking sheet and heat in the oven for 8-10 minutes or until hot enough. Using a rack ensures that the undersides of the samosas do not burn as a result of coming in contact with the hot baking sheet. If you do not have a rack, place the samosas directly on a baking sheet lined with aluminum foil and flip them three or four times so that they heat evenly. This method of reheating will restore some of the crispiness.
Print the Recipe
How to Make Beef Samosa Using Tortillas as Wraps: Easy Recipe with Amazing Results
Course: MainCuisine: East African, IndianDifficulty: Moderately Difficult4
servings30
minutes10
minutes258
kcal40
minutesThis simple recipe helps cut down samosa preparation time significantly without compromising on the taste or texture of the samosas.
Ingredients
Flour Tortillas – 4 (large: about 10-inch wide)
Ground beef – 1lb (lean)
Red onions – 1 cup (chopped)
Garlic – 1 tbsp (crushed)
Green onions – ½ cup (chopped)
Cilantro – ½ cup (chopped)
Salt plus dry seasonings (black pepper and beef masala)
All-purpose flour (1/2 cup), cold water (1/2 cup), and a little salt (salt is optional) to make glue batter
Oil for deep frying
Directions
- Step 1: Prepare your ground beef filling: Heat about a tablespoon of cooking oil on medium-high. Fry a quarter cup of chopped red onions until slightly brown. Add garlic and fry for a minute or until it begins to change color too. Do not let the garlic brown too much. Add the ground beef. As it cooks, break it down with a wooden spoon to crush all the lumps. The meat should not be lumpy at all as that will complicate the samosa creation process. After the meat has lost its (raw) red color and has released some fluid, add salt and the dry seasonings. Cook for another minute, then add the rest of the red onions as well as the green onions. Stir them in and cover the pot for a minute so the onions can soften a little. Do not overcook. Finally, stir in the cilantro and take the pot off the heat. Leave it open or transfer the filling to a wide plate to cool down.
- Step 2: Prepare the samosa glue batter: In a bowl, combine half a cup of all-purpose flour, salt to taste (optional), and cold water to create a light, runny batter. The batter should not be too thin as it may not hold the tortillas well, neither should it be too thick as it will introduce a whole new texture and unnecessary chewiness to the tortillas.
- Step 3: Cut your flour tortillas correctly: Layer up four or five tortillas on a wide cutting board and cut them into halves then quarters. As simple as that. Layering them up before cutting ensures the quarters are even in size.
- Step 4: Create your samosas: To create that nice triangular samosa shape, place the pie-shaped tortilla wrap on a flat surface with the sharp end facing you. Then, bring each of the curved ends towards the middle of the curve, one folding over the other, and the edge sharp and sealed. Apply the glue batter in between the two overlapping flaps of tortilla and seal (please watch the recipe video to get a clear picture of these steps). Then, fill the tortilla shell with about a tablespoon of ground beef. Do not overfill. Leave enough room for the overlapping flaps to fold over and tuck into the back end to seal in the stuffing. Apply glue on top of the folded-over section as well as on the sharp-edged section. Then, fold over the sharp-edged section and neatly stick it down, paying attention to the corners to make sure they are fully sealed. Press on each corner to seal it off completely. Place the samosa aside and repeat with the rest.
- Step 5: Fry the samosas: Heat deep frying oil on medium to medium-high. Once fully hot, add enough samosas to it so that they do not overlap. Allow the samosas to cook until browned enough before flipping. Flip and cook on the second side, then drain and place them on a plate lined with paper towels to absorb any excess oil. Allow the samosas to cool for about 7-10 minutes before eating. Otherwise, the stuffing may be extremely hot even when the exterior seems cool.
Recipe Video
Notes
Conclusion
That’s how easy this recipe is. As long as you figure out how to shape, correctly fill, and seal the samosas, you are all set. This recipe is simple but the result is a crispy, flavorful samosa that can be thoroughly enjoyed at any time of day and on any occasion. Please share your thoughts in the comments and if you do make the recipe, I’d love to know it came out!
More samosa recipes coming soon – (1) high protein vegetarian samosa, (2) chicken samosa using spring rolls as wraps, and finally, (3 & 4) both meat and vegetarian samosa recipes made with homemade wraps. You know, the long recipe with all the details. Stay tuned!